MacBook Screen Recording: A Step-by-Step Guide
MacBook Screen Recording
In today’s digital age, the ability to capture your MacBook screen is an invaluable skill. Whether you’re creating tutorials, sharing presentations, or troubleshooting tech issues, knowing how to record your MacBook screen can enhance your productivity and communication. In this comprehensive guide, we’ll walk you through the process of screen recording on your MacBook, from start to finish.
1. Understanding Built-in Tools:
Fortunately, macOS comes equipped with powerful built-in tools for screen recording. QuickTime Player, a versatile multimedia player, also serves as a proficient screen recorder.
2. Initiating Screen Recording:
To commence the screen recording process, follow these simple steps:
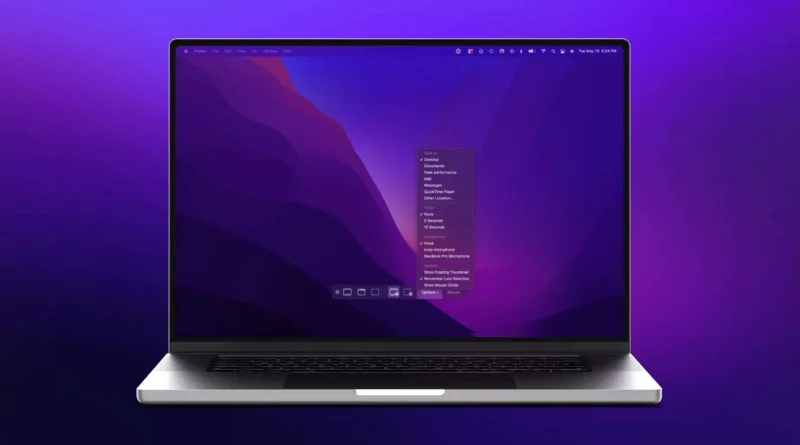
a. Launch QuickTime Player from your Applications folder or by using Spotlight Search.
b. Click on “File” in the menu bar and select “New Screen Recording.”
c. A small recording window will appear with a red record button. Click on it to begin recording.
d. If you wish to record audio along with the screen, click on the arrow next to the record button and select your preferred microphone source.
3. Navigating Screen Recording:
Once you’ve initiated the recording, your entire screen will be captured unless you adjust the recording settings. To record only a portion of your screen, click and drag to select the desired area before starting the recording.
4. Completing the Recording:
When you’ve finished recording, either click on the stop button in the menu bar or press “Command + Control + Esc” on your keyboard.
5. Saving Your Recording:
After stopping the recording, QuickTime Player will automatically open the recorded video. Simply navigate to “File” and select “Save” to preserve the recording on your MacBook.
6. Stopping Screen Recording on MacBook:
To stop screen recording on your MacBook, follow these steps:
a. Click on the stop button in the menu bar.
b. Alternatively, press “Command + Control + Esc” to halt the recording instantly.
7. Editing Your Recording (Optional):
Should you wish to edit your recording, you can utilize video editing software like iMovie or Adobe Premiere Pro. These tools enable you to trim, add effects, and enhance your recordings to meet your specific requirements.
8. Sharing Your Recording:
Once your recording is finalized, you can effortlessly share it with colleagues, friends, or your audience. Simply attach the video file to an email, upload it to a cloud storage service, or share it directly via messaging platforms.
In conclusion, mastering screen recording on your MacBook opens up a world of possibilities for communication, collaboration, and content creation. By following the steps outlined in this guide, you’ll be well-equipped to capture and share your screen seamlessly.
Whether you’re a teacher, entrepreneur, or content creator, harnessing the power of MacBook screen recording can elevate your digital presence and streamline your workflow.
Start recording today and unlock the full potential of your MacBook!